
I am in no way telling anyone to kill a perfectly working all in one board. I only suggest doing this if the board is already phoenixed or suicide.
Every time you see an all in one board, 90% of the time it's Marvel vs Capcom. While I do enjoy this game, to me there are better games to turn this into. So the first step we're going to take is downloading CPS2Black. This software basically turns your rom files and packages them into a BIN file for your CPS3 to read the files.
1. Download CPS2BLACK
2. Before we proceed with what game you're looking to turn this into, I believe only PALG games will work on this board. I have not heard of anyone converting to anything outside of PALG, so please take this into consideration.
3. Download your game rom files from Avalaunch website OR if you're looking to utilize undamned's InfiniKey, you can use original game roms. Please note you will only need roms 3-10 for CPS2Black
4. Extract CPS2Black and your roms in the same folder. Rename the rom files so that they're identical in the name, then change the file extension to go in the rom number order. In this guide I am using Super Turbo as my selected game.

5. Open up CMD.exe and run it as administrator. You will then change to the directory that CPS2Black and your roms files are located. To do this, type "CD c:\your directory goes here". In my example it is located in C:\CPS2BLACK

6. Now type CPS2Black. This will give you all the options available for CPS2black

7. Since we are going to be using a CPS3 and Darksoft cart to write to the SIMM, We will use the -SP option. We are using Super Turbo in this example, so we are going to type "cps2black -sp sfxj". Notice that it states it couldnt read rom 10, this is because Super turbo only uses roms 3-9.

8. It has now created a BIN file for you. We are going to take this bin file and burn it to a CD. I prefer to use IMGBurn because it's free and does everything you need when it comes to burning media. Put a blank CDR in your optical drive and open up imgburn. Then select "Write Files/folders to disc

9. Select the bin file that CPS2black created for you, then click the folder > disc image to proceed.
Side note, you can add more than 1 BIN file created by CPS2black. So if you want to add different versions of your game or just different games, you can do that.

Imgburn is then going to nag you that you're trying to create a data disc using an image file. Ignore this message and click yes to proceed.

Another window will pop up asking you to create a volume name. You can name this to whatever you want. I typically just type the rom name.
10. Your file(s) are now burned to a disc. Now you're gonna wanna pop out that CPS3 darksoft kit. Remove the 32mb simm from the CPS2 board and place it in slot 7 on the CPS3 board.

Turn on the the CPS3 board and make sure you hold Player 1 Start button as you turn it on to enter Darksoft menu. Select "Disk and File". Please allow the disc drive at least 30 seconds to read the drive before you do this, otherwise if you try to go to disk and files too fast, it'll freeze and you'll have to reboot the system and start over.

Select your BIN file by hitting SHOT 1

Select option 2 to "Write to Flash Memory"

Then choose the 32mb Simm in Slot7 by pressing SHOT 1 twice. The SIMM will then began the erasing and writing process.

11. Once the SIMM is done writing, you will be pushed back to the main menu of the Disk and Files. You can now turn off your CPS3 and remove the simm from SLOT7.
12. If you are just reviving the board using avalaunch/phoenix code, simply insert the SIMM back into CPS2 board and you should be back to playing your game :)
13. If you're looking to do a conversion, remove all the mask roms and Qsound roms from the board. Replace them with your newly burned mask roms and Qsound roms. Place your 32MB Simm back into it's slot as well if you haven't already

14. You will need to adjust the jumpers. I've noticed that all PALG conversions that I've done required that all the jumpers to be OPEN. By default for MVC it's set to 0101. Change this to 0000
15. If you're using original encrypted code, now is the time to solder your infikey to the CN9 connector that's near the SIMM slot. I will not show the process for this since it's readily available in undamned infikey thread.
Now I wanna add my own touch to it and replace that old MVC label with the repro label that I made

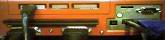
16. Now connect your CPS2 to your cabinet or supergun. Hopefully you'll get a screen of your new conversion or resurrection


More...