 For the most part, things are in pretty good shape. The cabinet is complete and stable. Everything is there!
  The monitor is a 19″ Hantarex model, and has light Robotron burn, but no chassis
  Removing the bezels is required to get the thing out
  well, this is what 30 years of arcade grime looks like
  It’s a combination of cigarette smoke oily tar and dust
  As the sun was out, I decided this was the best route to get it cleaned up. Agitate some detergent with a brush all over
 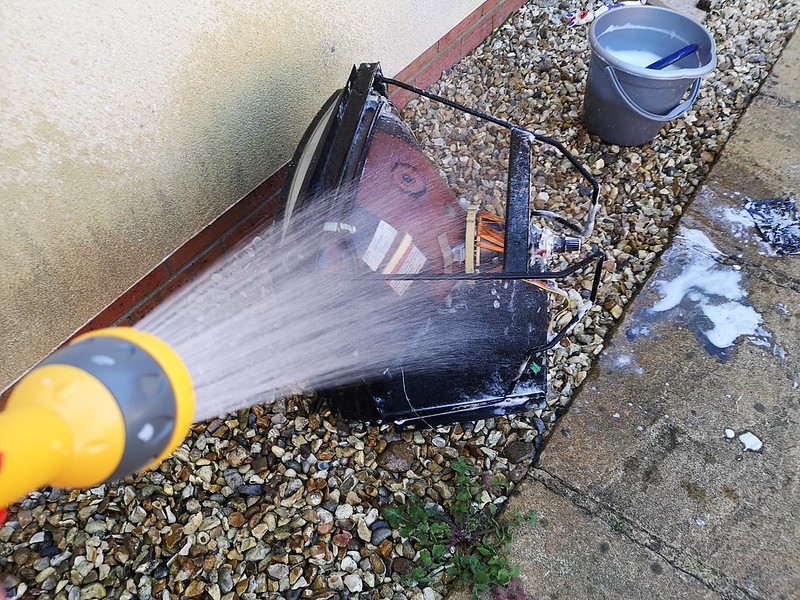 After leaving the detergent to do its stuff for 10 minute, I rinsed everything off
  Looking much better!
  I left the monitor to dry off for the rest of the the day
 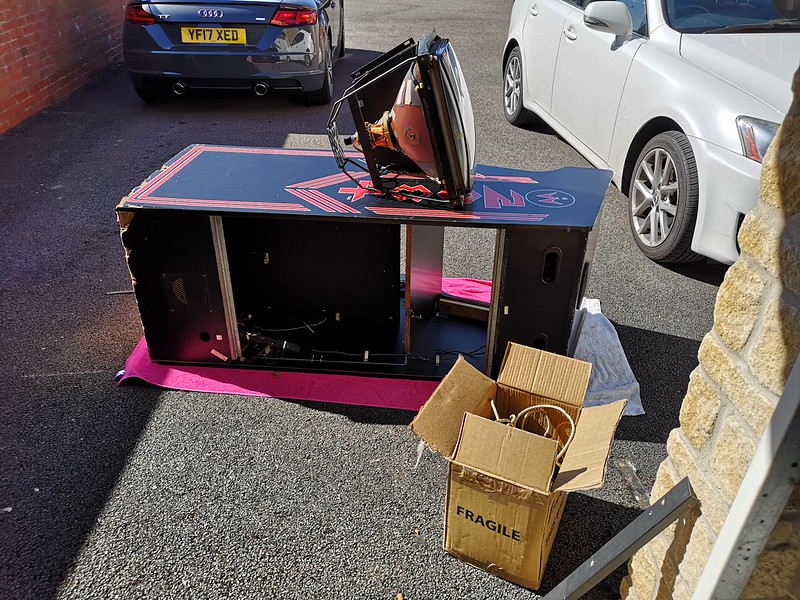 A sunbathing Robotron So back to the cabinet. The real issue I have to deal with is the damage to the base at the sides:
 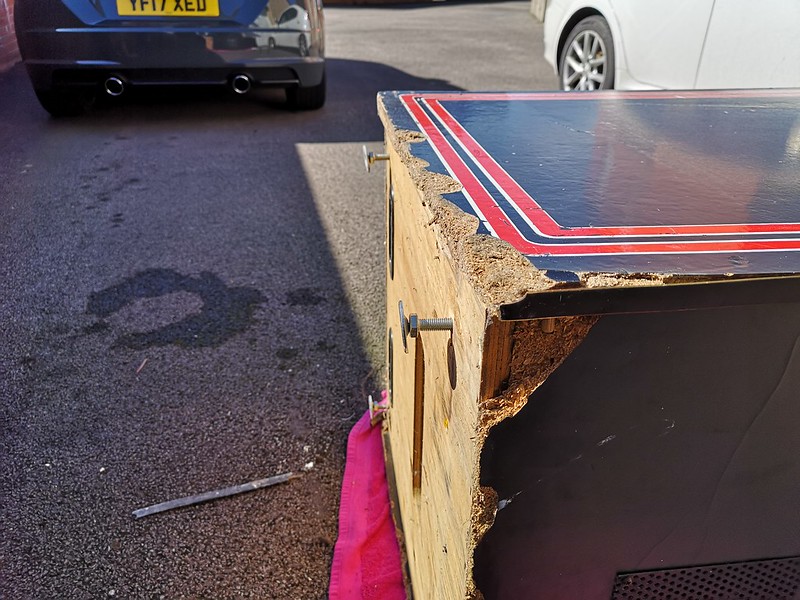 This is what happens when cabinets are moved around with no feet attached! I’ve now got feet on the cabinet as you can see, but that damage needs fixing. The damage towards the rear is so bad, that I decided the best thing to do, would be to remove what’s left of the part that hangs over the base on each side
  So we have to be confident. I got the saw out and cut a straight line along the bottom of the cabinet
  It seems drastic, but as you can see, we now have a nice neat bottom edge to work with, making any repair here much more stable and secure – not to mention easier!
  But before we start, let’s get this exposed particle board sorted out. Wood hardener is good for this. Apply a liberal amount to all exposed wood. This will give our filler a secure base to attach itself to
  So a bit of prep is required before we start. I’ve masked off the sides to avoid over spill of the filler onto our artwork. That white panel has been sprayed with silicone grease, and will provide us with a straight edge to mold our filler along the bottom. It’s resting on the two feet on the underside of the cabinet
  Here you can see how the white laminate board provides the straight edge. Work methodically, preparing small amounts of filler mix as you go, to make sure what you’re using is still plyable
  Let your filler dry a little then slide your silicone grease-prepared board away and leave to dry
  Then remove the masking tape before the filler fully dries. And there we go – not bad. This needs sanding of course, but I’m pretty pleased with that. I need to have a think about how I’m going to touch up the paintwork here. I may well have a go at reproducing that red stripe, which should be fun (gulp) Well there you go – progress so far. More in part thee next time, where we’ll get our filler sanded down, touch up the paint, replace the t-molding and rebuild the cabinet ready to play again!
See you next time.
Tony [h=2]Follow Blog via Email[/h] Enter your email address to follow this blog and receive notifications of new posts by email.
Follow
More...