
Even if a little late, I'd like to share it on Arcade Projects (sorry for my bad "Engrish", any translation improvement is welcome, of course).
PREMISE
A couple of years ago emulation on Raspberry Pi was (IMHO) rather inconsistent due to two technical limitations: very low computing power and absence of a good analogue video output (unless using adapters that introduced lag and invalidated the convenience of RPi as in this old but yet heroically pioneering tutorial).
At the beginning of 2016, however, things changed: the Raspberry Pi 3 finally had enough computing power to emulate decently most of the arcade classics of the early '90s.
As for analogue video output, there have been two significant improvements:
- Gert's VGA 666 board: a small hat that, through the GPIO port, provides a direct VGA output, i.e. analogue video signal in RGB and no lag.
- An "explosive" combo of two new firmware features: creation of custom non-standard video modes and the ability to enable and modify them on the fly.
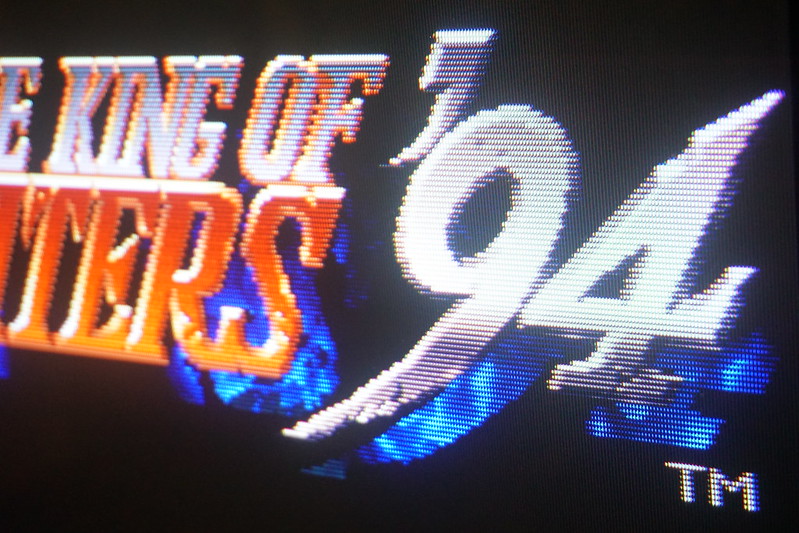
Neogeo MV-1FZ and AdvanceMAME on Raspberry Pi: which is which?

Not a noisy PC with modded GPU and Windows' hourglass, just a 35 $ Raspberry Pi 3!


Compact, silent, inexpensive.
Here's how it works.
REQUIREMENTS
- Raspberry Pi 2 or 3 (with keyboard, power supply and micro-SD card)
- Gert's VGA 666 hat
- VGA - SCART cable (USB powered)
- CRT TV with (SCART) RGB input, preferably multistandard (PAL 50Hz and NTSC 60Hz), or Arcade monitor of course
- PC (or Mac) with a micro-SD card reader (only for initial configuration)
- HDMI monitor (only for initial configuration)
RASPBIAN INSTALLATION AND INITIAL CONFIGURATION
Download Raspbian LITE OS here: raspberrypi.org/downloads/raspbian/.
Unzip the archive and write (DO NOT copy) the ISO image on your micro-SD card: raspberrypi.org/documentation/…lation/installing-images/.
Connect RPi to Internet: wired (ethernet) connection, which I recommend to beginners, does not requires any specific configuration in most cases.
Get ready for first boot: insert the micro-SD card and connect keyboard, HDMI monitor and power supply to RPi.
It will turn on and you'll see the boot sequence, then you will be asked to login with username (pi) and password (raspberry).
After the first boot it is recommended to run raspi-config utility to expand the filesystem and set correct date and time. Type:
sudo raspi-config
First of all expand the filesystem to take advantage of all the available storage on the micro-SD card: select the EXPAND FILESYSTEM option and follow the instructions (millennials: navigate with arrows and TAB keys, SPACE to select, ENTER to confirm, ESC to cancel). I would also suggest to enable auto-login and disable wait-for-network in BOOT OPTIONS. Finally, make sure that date and time are correct in INTERNATIONALISATION OPTIONS > CHANGE TIMEZONE (this to prevent issues during the build process of AdvanceMAME)
Exit and reboot.
Now it is good to check if there are updates for the OS or its packages. Type:
sudo apt-get update
...and then update with:
sudo apt-get upgrade
You will be asked to confirm installation with uppercase "Y". At the end you will be greeted again by the flashing cursor of the prompt.
BUILD ADVANCEMAME AND ADVANCEMENU
Time to build AdvanceMAME and AdvanceMENU from sources. First of all, install all the tools required to download and build latest source code on RPi, taking care to correctly type names of the various packages (git, autoconf etc.) followed by a space as separator:
sudo apt-get install git autoconf automake libsdl2-dev libasound2-dev libfreetype6-dev zlib1g-dev libexpat1-dev libslang2-dev libncurses5-dev
Confirm the installation with uppercase "Y".
Proceed to download of AdvanceMAME source code from the official GitHub repository, using the git tool just installed:
git clone https://github.com/amadvance/advancemame.git
Source code will be downloaded into the advancemame folder of user's home, so enter this folder to continue:
cd advancemame
To start the build process, which will generate the optimized executables of AdvanceMAME and AdvanceMENU, two preliminary steps are needed.
First launch the script that generates the configuration file needed to build the sources:
sh autogen.sh
Then configure automatically all the parameters:
./configure
...and finally start building:
make -j3
The "-j3" option will use three parallel processes, speeding up the building process (which, in any case, will take about half an hour to complete, so it's the right time for a nice cup of tea, coffee etc). At the end, if everything was successful, you'll see the prompt flashing without errors. This means that in the source code folder the binary (executable) files of AdvanceMAME and AdvanceMENU have just been created.
Now launch the installation script which will copy all the executable files into the right folders to make everything work properly:
sudo make install
Type:
cd ..
advmame robby
If MAME starts up, congratulations: you have just built (and installed) latest version of AdvanceMAME and AdvanceMENU on your Raspberry Pi!
MANUAL SETUP (recommended for CRT TVs)
If you will use the Raspberry Pi on an old CRT TV via VGA 666 hat and SCART cable (RPi > VGA 666 > VGA-SCART > CRT TV), it's preferable to manually select and fine-tune the "archetypical" (basic) video modes supported by your TV: among these AdvanceMAME will then automatically pick the best one for the game ROM, varying horizontal resolution and clock in order to offer the most accurate visual experience possible. Next steps are aimed at configuring AdvanceMAME in this way, while the advv utility will be used for video modes selection and tuning.
Enter in the hidden configuration folder of AdvanceMAME:
cd .advance
Open with a text editor (on Raspbian there's one named "nano") the config of AdvanceMAME:
sudo nano advmame.rc
Since you will use the RPi on a multistandard cathode TV (i.e. capable of supporting both PAL 50Hz and NTSC 60Hz), add the following line:
device_video_clock 4-100 / 15-16 / 50-60
...then look for the line with display_adjust: this option controls how AdvanceMAME generates the video modes, modify it as follows:
display_adjust xclock
AdvanceMAME will adjusts the available modeline's horizontal resolution and the vertical clock.
Now look for the line with display_magnify. This option suggests the adoption of a double or bigger resolution video mode. Since it is mainly used to enable effects like 'scalex', 'scalek', 'lq', 'hq' and 'xbr' which are beyond the purpose of this tutorial, stick it to normal size:
display_magnify 1
Finally look for the line with display_resize. It suggests the favorite image stretching when a video mode with the correct size isn't available, so stick it again to the original size:
display_resize none
Save changes ("CTRL+X" then "Y") and, once back at the prompt, turn off the RPi with
poweroff
Now it's time to connect the RPi to the CRT TV, but do another operation meanwhile. Remove the micro-SD card from RPi and insert it into the card reader of your PC: two volumes will open. Not recognizing the Linux filesystem, Windows will ask to format one partition: obviously do NOT proceed, and click CANCEL instead. On the other partition, perfectly readable in Windows (and Mac) there is the Raspberry Pi main configuration file named config.txt.
Open it with a text editor (I would suggest Notepad++ or TextWrangler) and change it as follows:
[h=3]Source Code: config.txt[/h]
- device_tree=bcm2710-rpi-3-b.dtb
- dtparam=i2c_arm=off
- dtparam=i2s=off
- dtparam=spi=off
- dtparam=uart0=off
- dtparam=uart1=off
- dtoverlay=pi3-disable-bt-overlay
- dtoverlay=pi3-enable-wifi
- dtoverlay=vga666
- enable_dpi_lcd=1
- display_default_lcd=1
- dpi_group=2
- dpi_mode=87
- hdmi_timings=320 1 20 29 35 224 1 10 14 16 0 0 0 60 0 6400000 1
- scaling_kernel=8
- gpu_mem=128
- dtparam=audio=on
- sdtv_mode=16
- boot_delay=1
- force_turbo=1
Display All
Let's see briefly what these options do:
- lines 1-6 free the GPIO pins for the VGA 666 hat
- lines 7-9 disable Bluetooth (not mandatory), enable Wifi (not mandatory) and, most of all, enable the VGA 666
- lines 10-11 set VGA 666 as main video output
- lines 12-14 are very important: they set a custom video mode (mode 87) that AdvanceMAME can change on the fly. At boot a 320x224 resolution (like SEGA Genesis) is set.
- line 15 is a little-known but fundamental option that sets a nearest-neighbour scaling of RPi framebuffer, avoiding any kind of blending or filtering
- lines 16-17 enable audio and set the memory split
- line 18 is a nice "extra feature" beyond this tutorial (so it's not mandatory) which enables 240p through the composite-out of RPi (very nice for console emulation!)

- lines 19-20 are not mandatory, but they disable dynamic clocking (so all frequencies and voltages stay high), and preserve the micro-SD card from corruption (if a yellow lightning strike icon appears on the screen, get a power supply with a higher or more stable amperage)
If everything is fine, the boot sequence of RPi will appear on the "AV-1" channel of your CRT TV!
Selection of basic video modes through advv
You are almost there! Now it's time to manually select and fine-tune the "archetypical" (basic) video modes supported by your TV: it might seem a bit inconvenient on CRT, but there are no alternatives.
BTW, although I explain how to do it now, I really would suggest doing this afterwards, and precisely after loading the ROMs on the RPi: I realized indeed that it is much more convenient to open in AdvanceMAME only the games that immediately interest us, and after checking the original video mode in the Information menu to useadvv to enable the closest video mode available (AdvanceMAME will do the rest). In this way all game ROMs with similar video modes will be just ready and the dvmame.rc configuration file will only be populated by video modes actually useful, without redundant or duplicate config lines.
So open the almighty advv utility typing:
advv
A long list of video modes will be presented: those in red are not supported by TV (ignore them) while that in blue should be supported, being in the range of the values set with the device_video_clock option in advmame.rc.
So choose with the arrow keys a supported video mode, press ENTER and you'll see "the magic": advv will set that resolution (and refresh rate) on the fly, allowing a slight centering with directional arrow keys and sizing with "I" and "K" letter keys. ENTER again to save your adjustments for this video mode.
Now back to the main list, tag the video mode just tested with SPACE BAR: it will be highlighted and added in the "basket" of valid video modes on which AdvanceMAME will dynamically offer the most accurate one for the game ROM (with appropriate automatic adjustments of horizontal resolution and clock, as previously stated in advmame.rc config file with the display_adjust xclock option).
Pressing F2 key will save the list of all modes selected: you can repeat these steps for every basic video mode supported by your TV at the same time or do it gradually instead, depending on the game actually played and running advv each time is needed, as previously suggested (remember that games with similar video modes will all benefit from the same basic video mode, appropriately optimized by AdvanceMAME automatically).
AUTOMATIC CREATION OF 'PERFECT' VIDEO MODES (for multisync PC monitors and Arcade monitors)
Coming soon...
LOADING ROMS
Given that the default folder for ROMs is located in /home/pi/.advance/roms, copying them from a USB stick should be quite simple and straightforward for those who already know a minimum of Linux CLI. Anyhow, I briefly describe the procedure below.
Get a USB flash drive formatted in FAT (FAT16 or FAT32) and on your PC copy the ROMs to a folder, i.e. "advroms".
Now connect the USB stick to one of the RPi ports, turn it on and, if this is the first time you do this, type:
mkdir usb
So you have created the "usb" folder to read the contents of your USB stick.
Now mount the device (sda1) right in this folder:
sudo mount /dev/sda1 ./usb
Enter the "advroms" folder and view the files it contains:
cd ./usb/advroms
ls
Now copy all files to AdvanceMAME roms folder:
cp * /home/pi/.advance/roms
...and that's it! (eventually cd /home/pi/ will always bring you back to home folder)
LOADING ROMS WIRELESSY WITH SAMBA
Coming soon...
ENABLE UNIBIOS FOR NEOGEO GAMES
Coming soon...
START ADVANCEMENU AT BOOT (hiding verbose)
Coming soon...
ENABLE KIOSK MODE (load/save states and turn off RPi with Joystick)
Coming soon...
ENABLE ATTRACT MODE BETWEEN ALL THE GAME ROMs
Coming soon...
ADD A COIN ACCEPTOR MECHANISM TO RPI
Coming soon...
DISPLAY GAME ROM INFOs IN REAL TIME ON A 16x2 LCD DISPLAY
Coming soon...
More...